Automatic drone guidance using monocular vision
Using Ardupilot and Raspberry Pi 5 + Hailo 8 AI HAT, with SCDepth

I always wanted to see if I could make a drone fly autonomously, using only vision. Some time ago, I’ve decided to make it happen. To make things more complicated, I’ve decided to only use one camera and use relative depth estimation. Because why not :) .
The hardware stack:
Flight computer:
Raspberry Pi 5 running the latest Rasberry OS
Hailo 8 AI HAT (26 tera-operations per second)
Drone components:
SpeedyBee F405 V4 flight controller
M1025Q - GEPRC GPS module
BetaFPV LiteRadio 4 ELRS RC controller. Useful for changing flight modes.
ExpressLRS ELRS 2.4G RX SX1280 Nano RC receiver
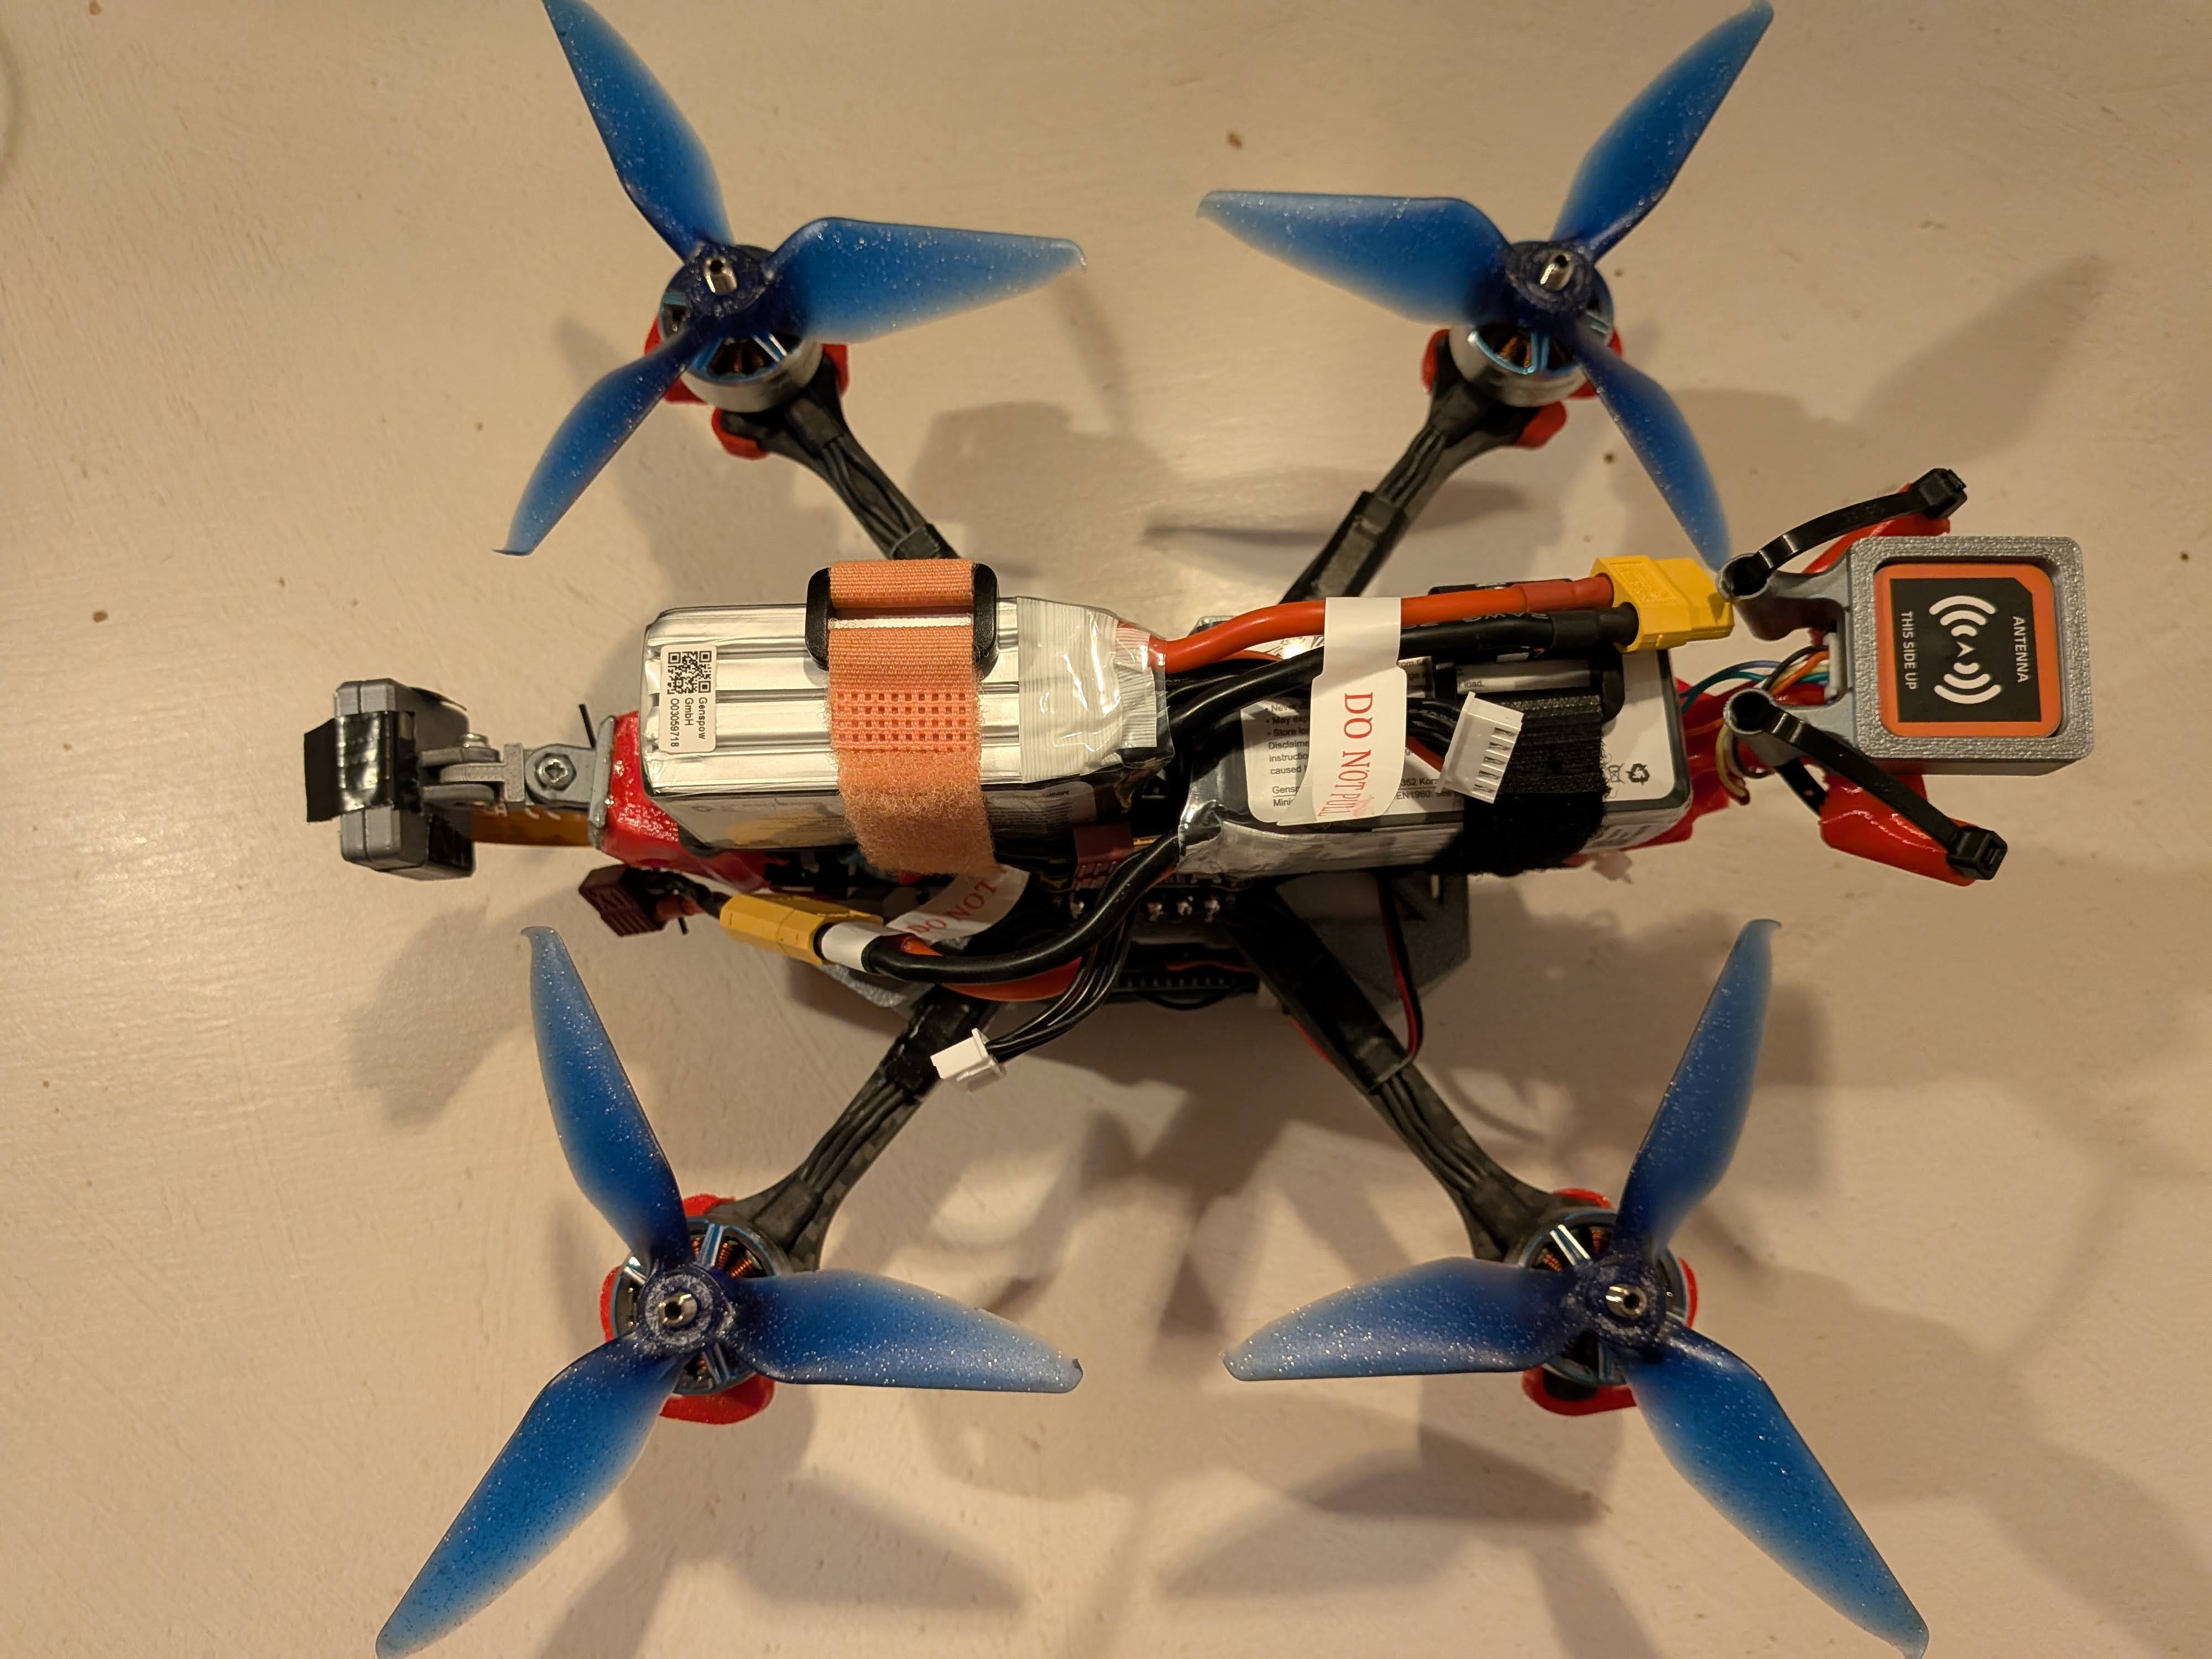
TBS Source One frame
PACER V2 P2207 Powerful freestyle - 1950 KV motors
The interface between the Raspberry Pi flight computer and the F405 MCU is done by connecting the F405 T2/ R2 UART2 pins to the Raspberry Pi T1/ R1 pins.
On the Raspberry Pi 5 you have to edit /boot/firmware/config.txt and set these two params:
enable_uart=1dtoverlay=uart0You can test the connection by using the following commands in the Raspberry Pi terminal after installing MavProxy in a virtual environment.
mavproxy.py --master=/dev/serial0 --baudrate 921600 --aircraft MyDroneAnd have a simple motor-test (spin one motor for one second), after removing the drone props.
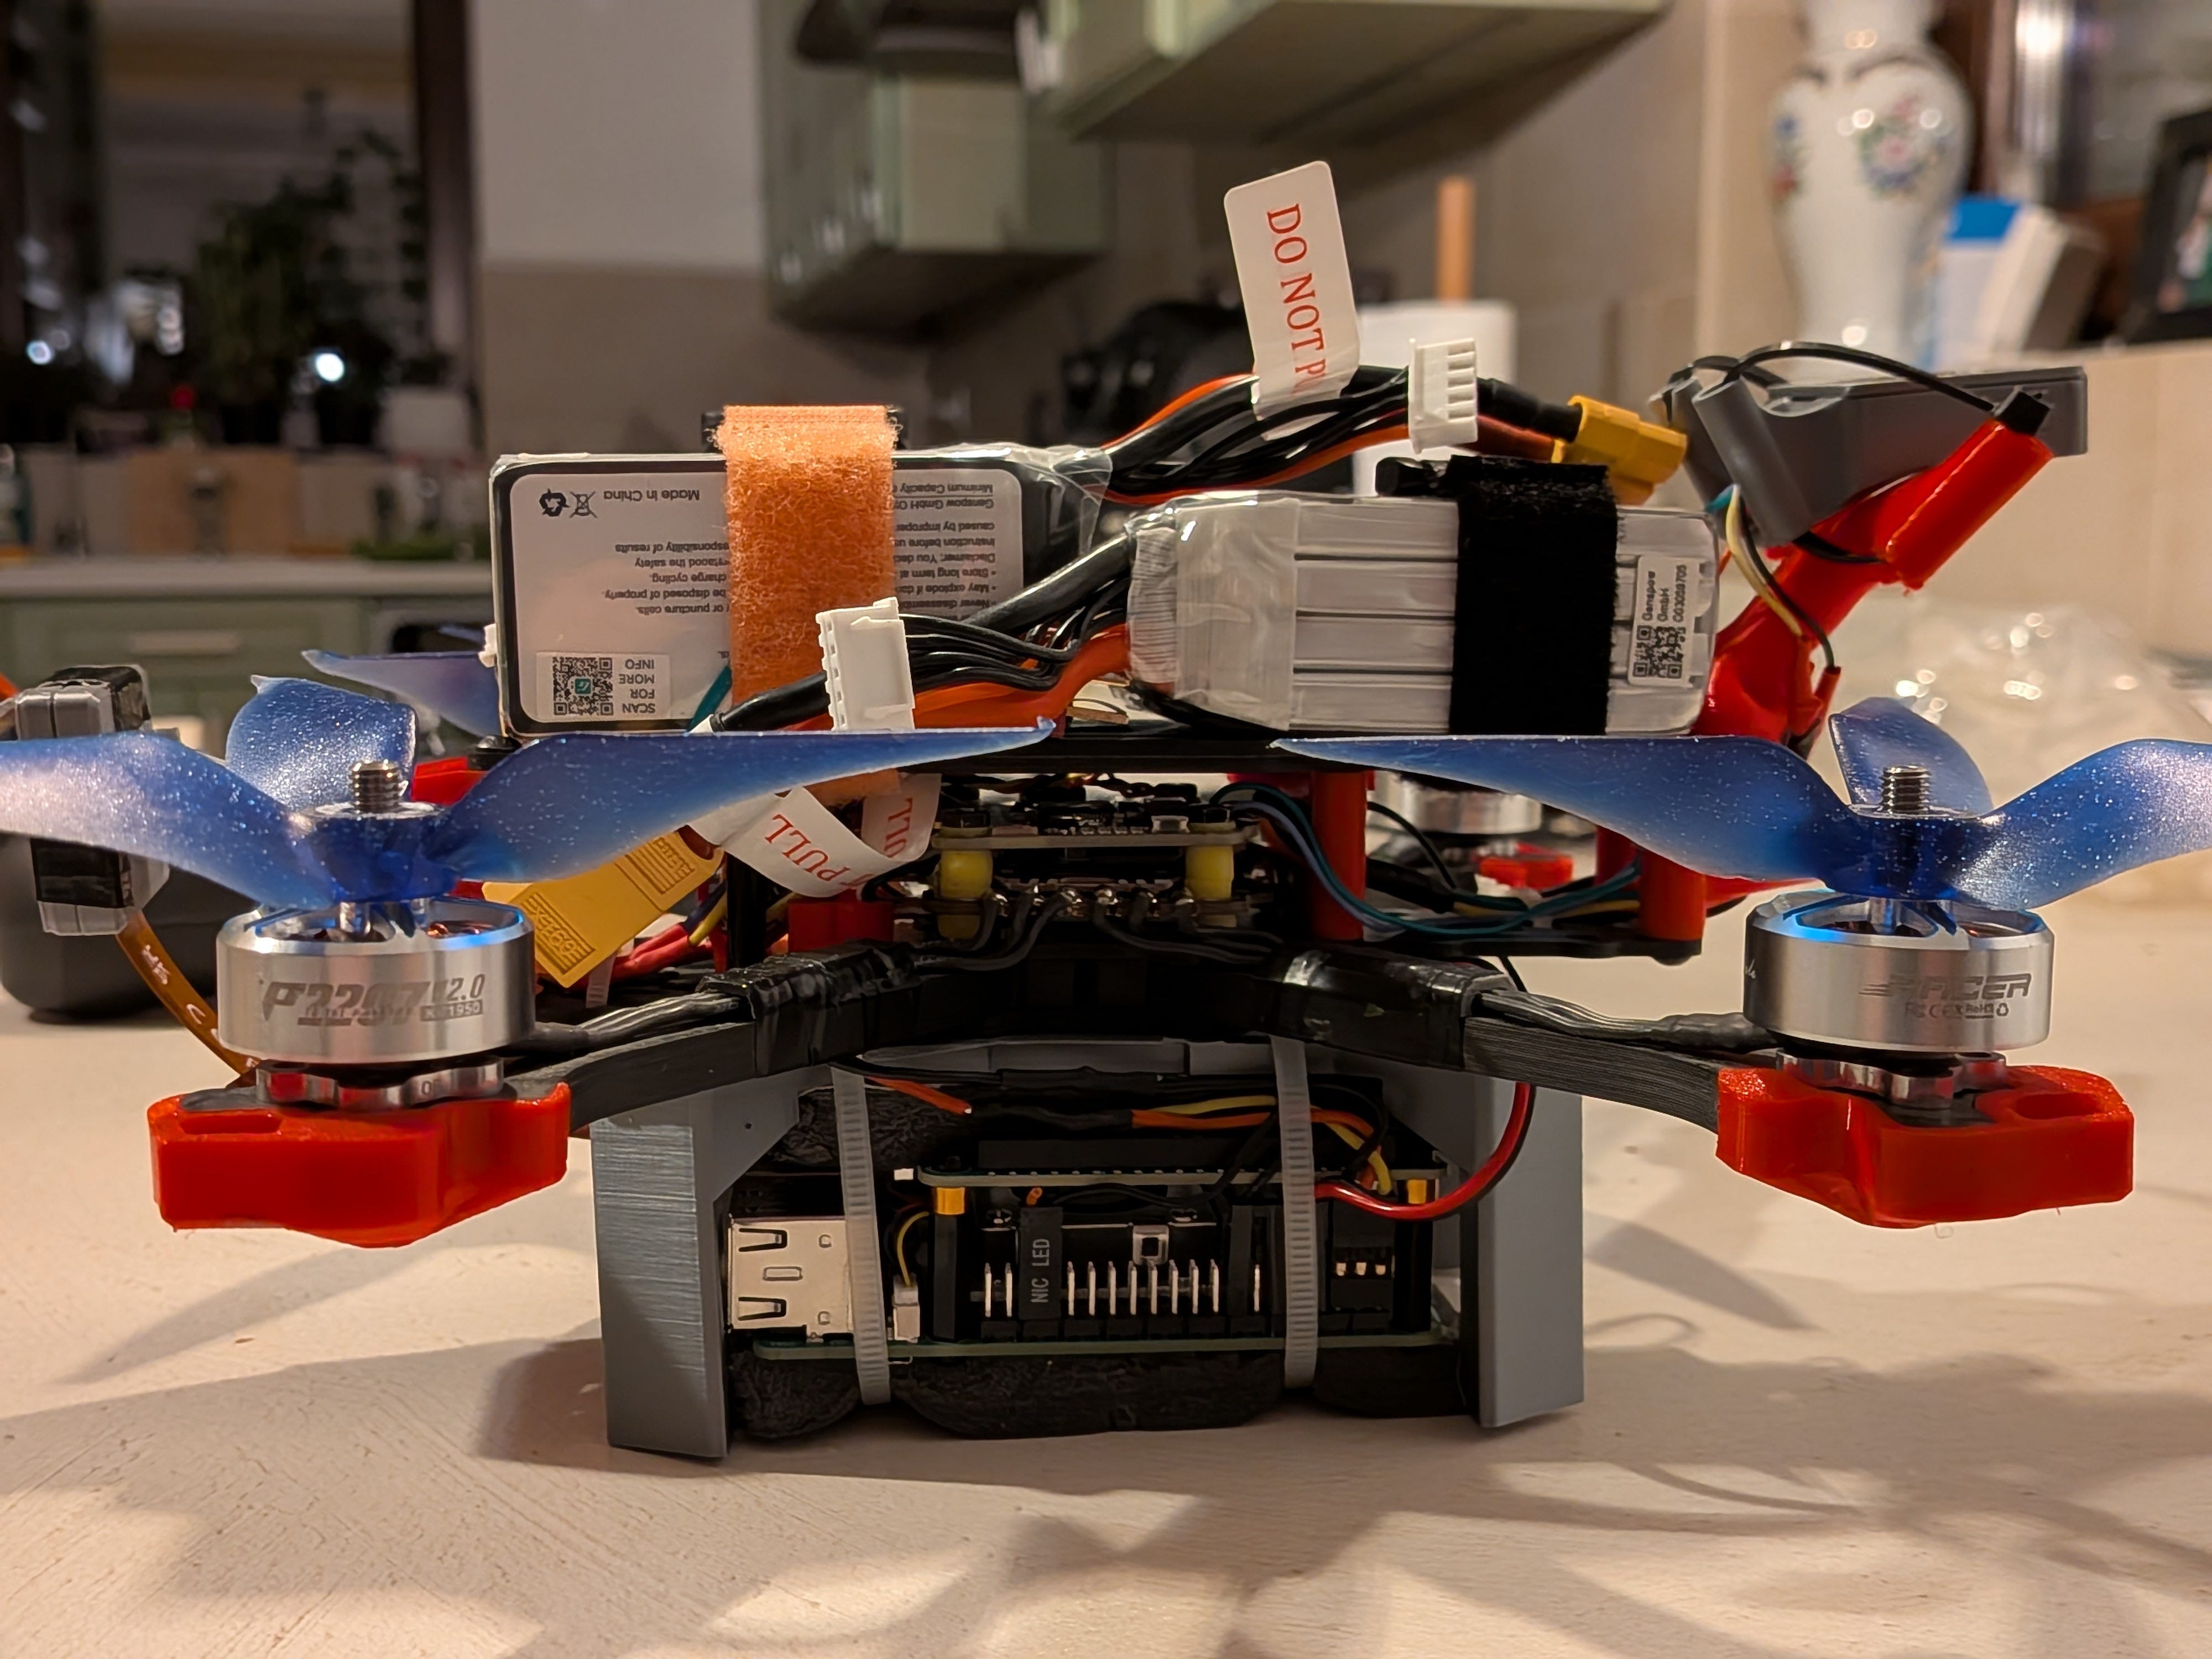
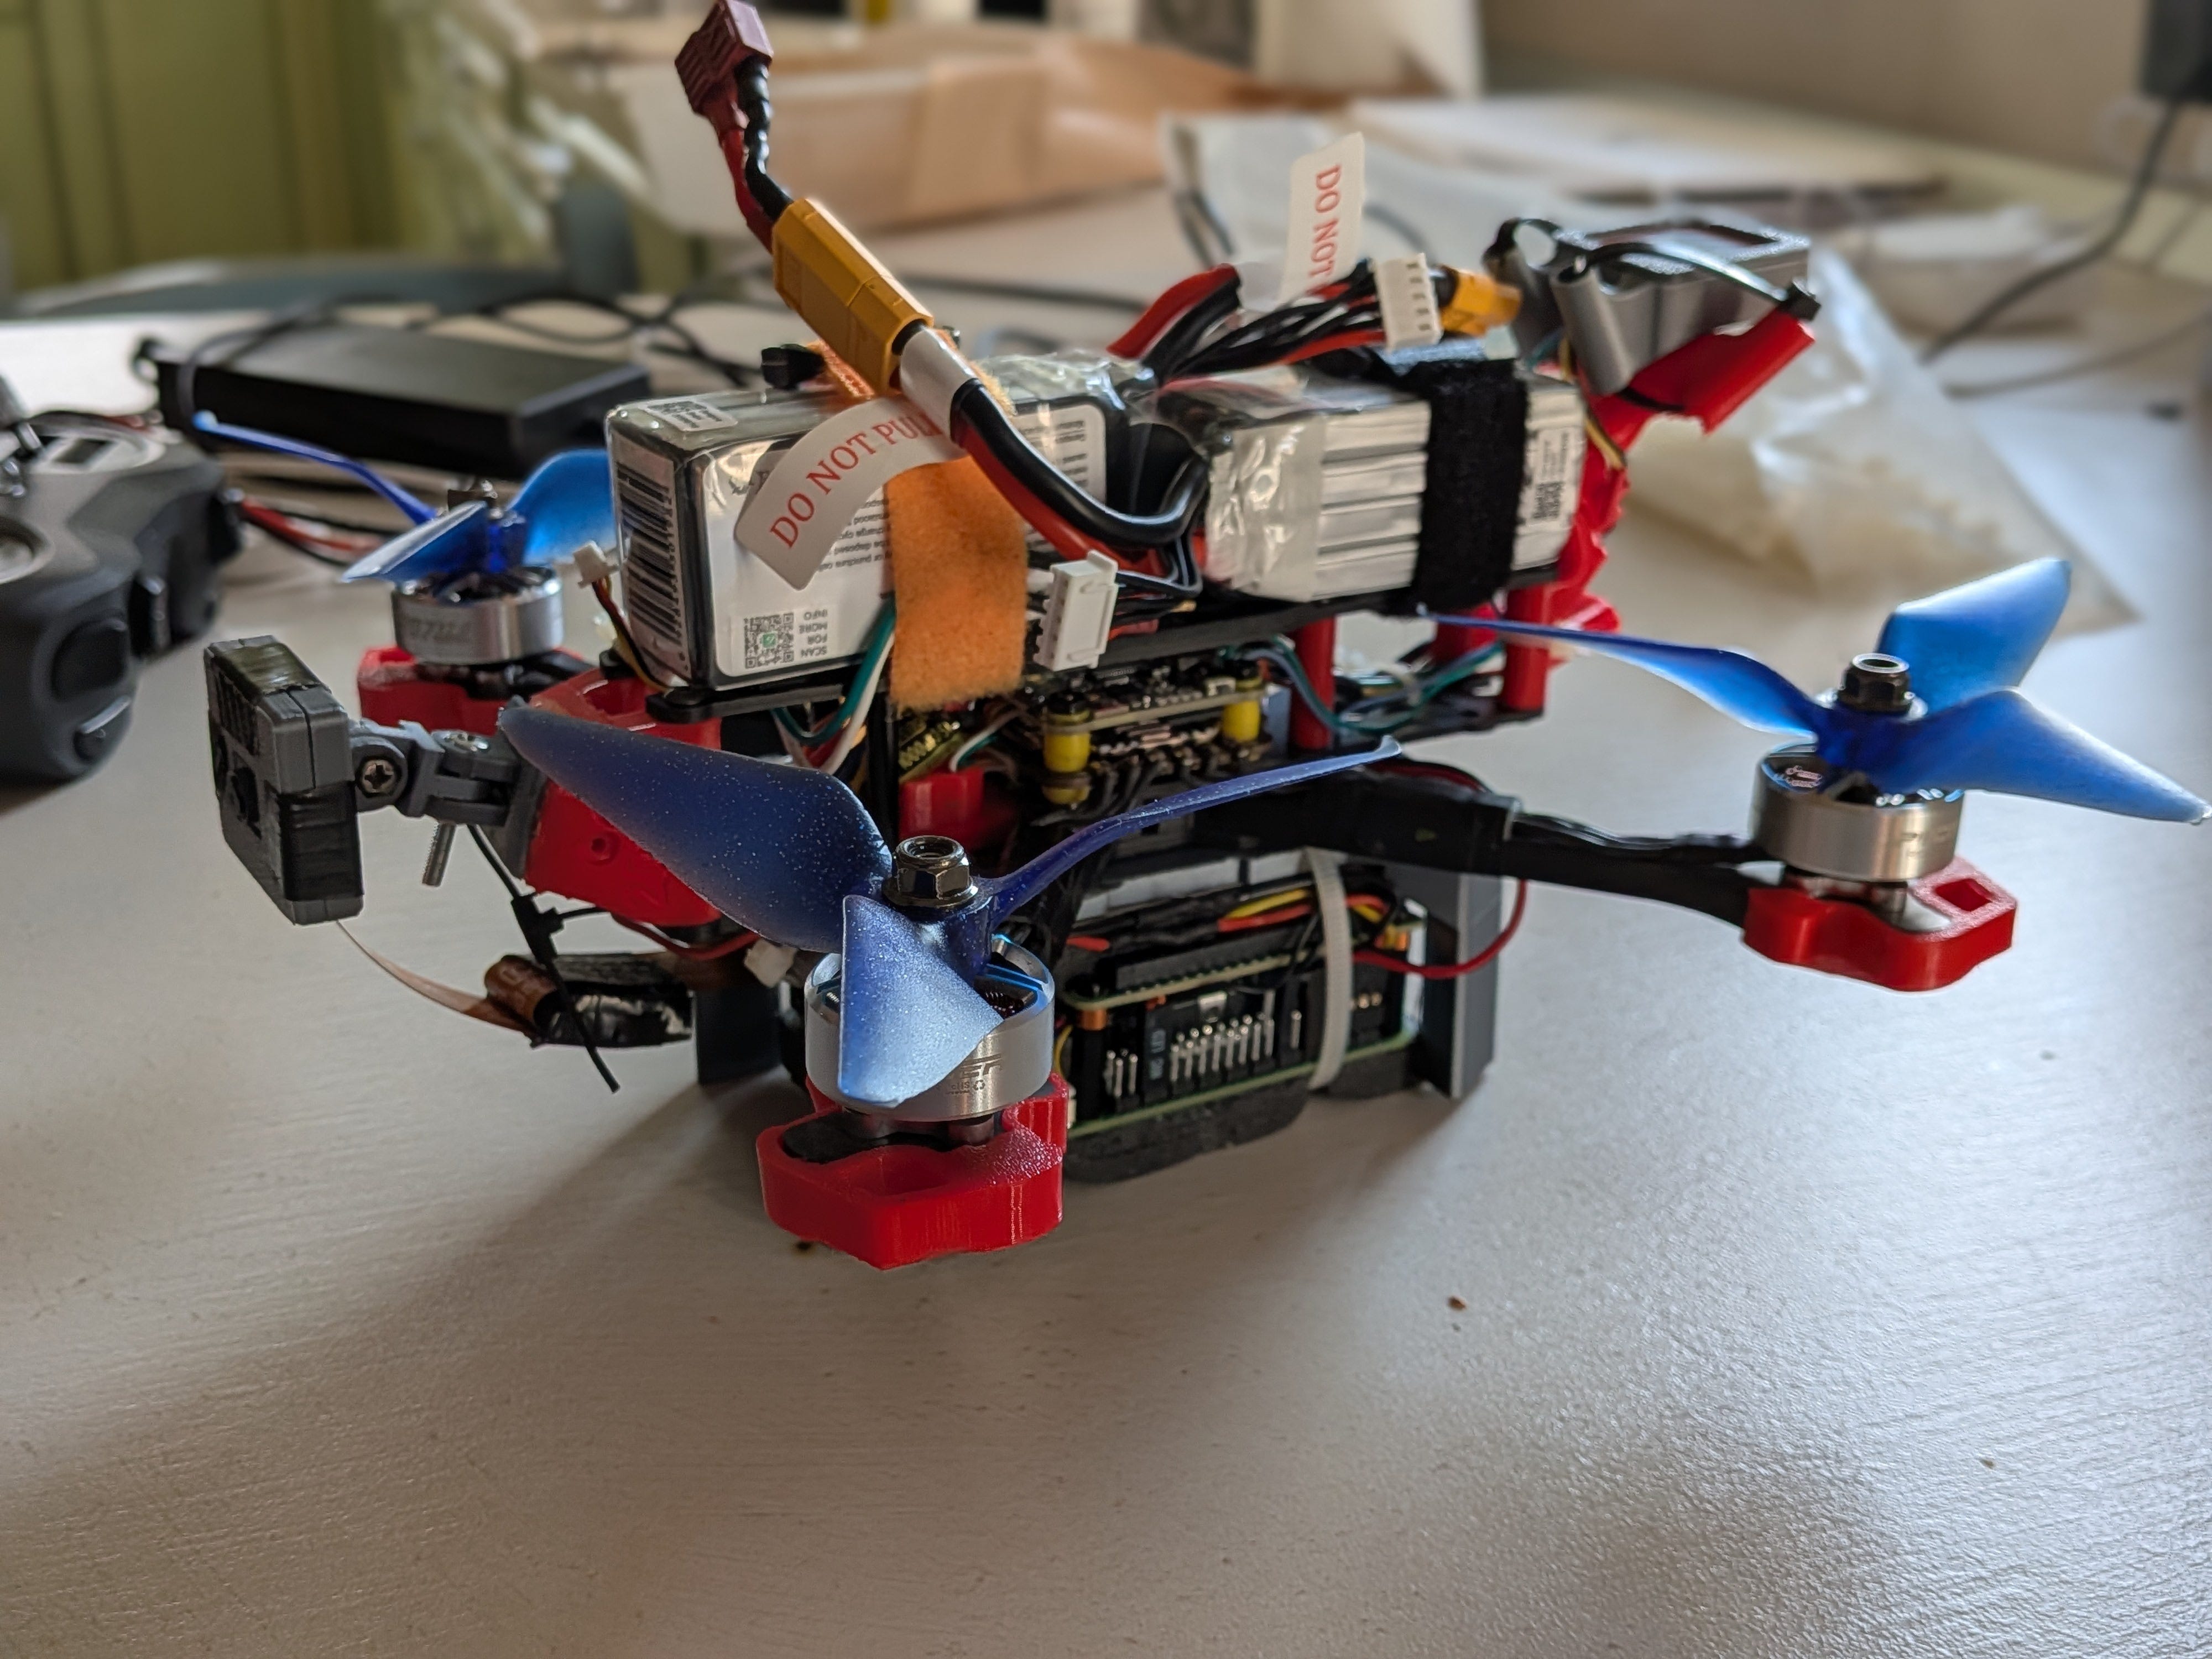
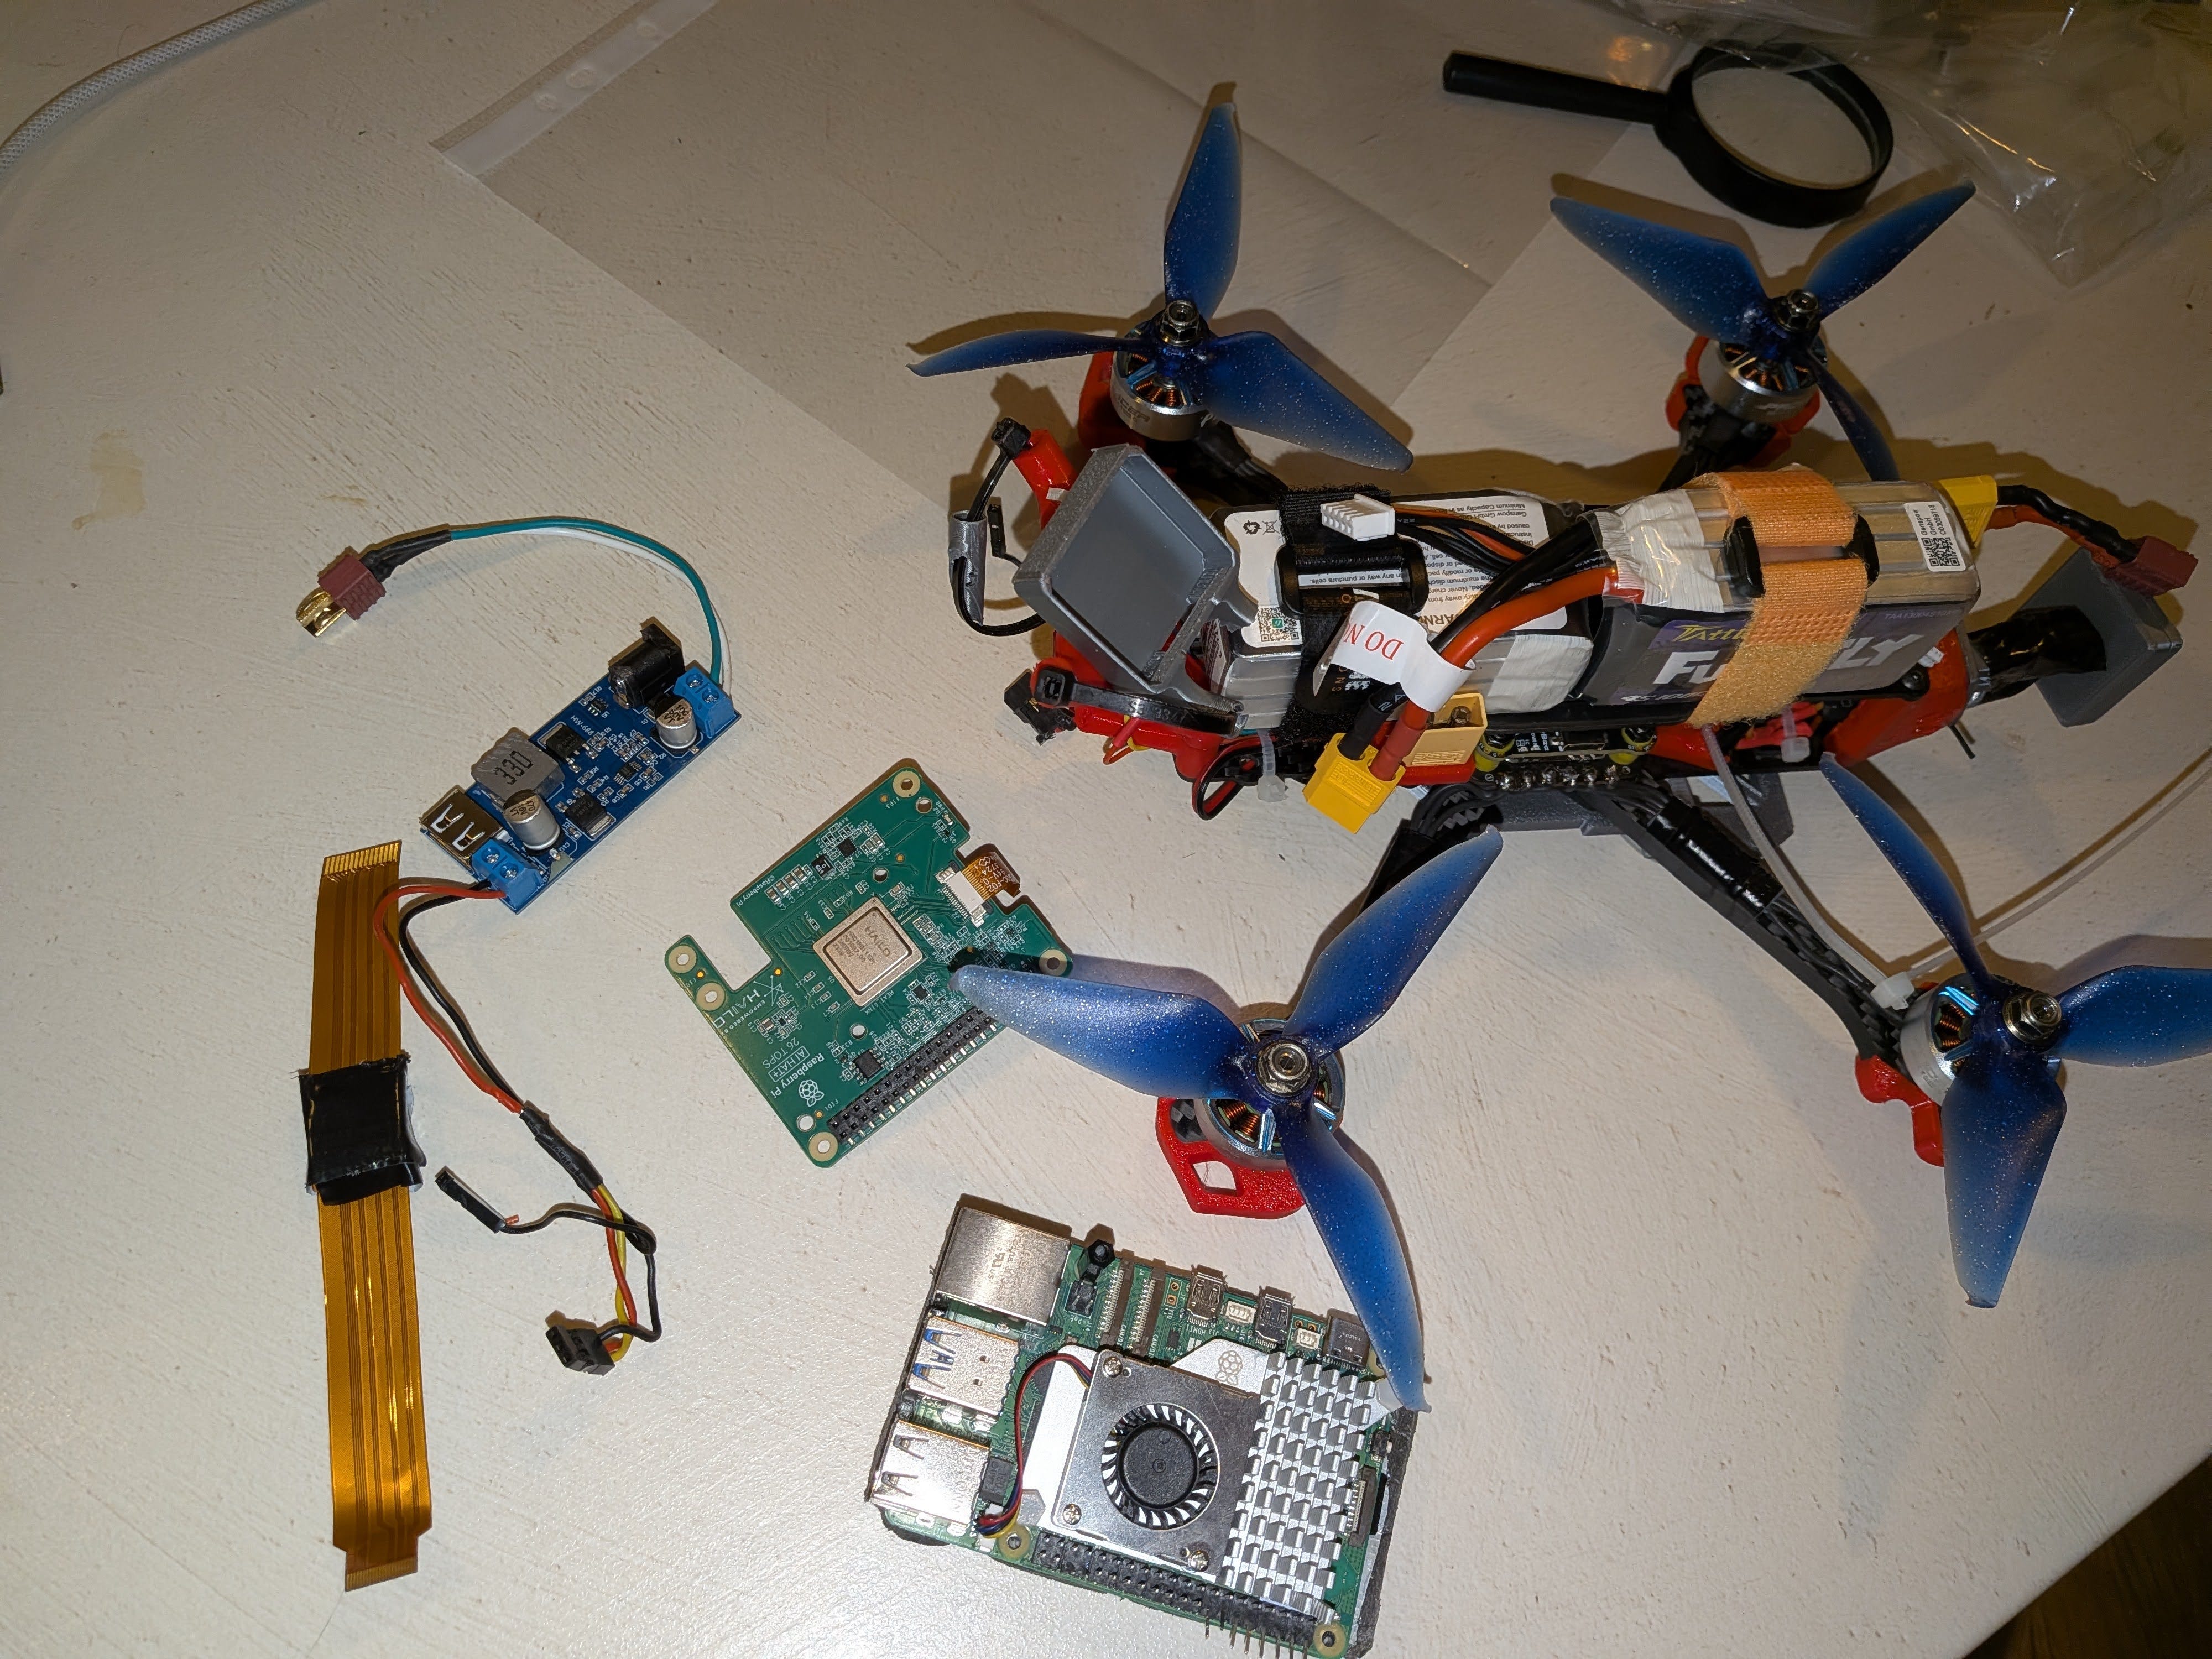
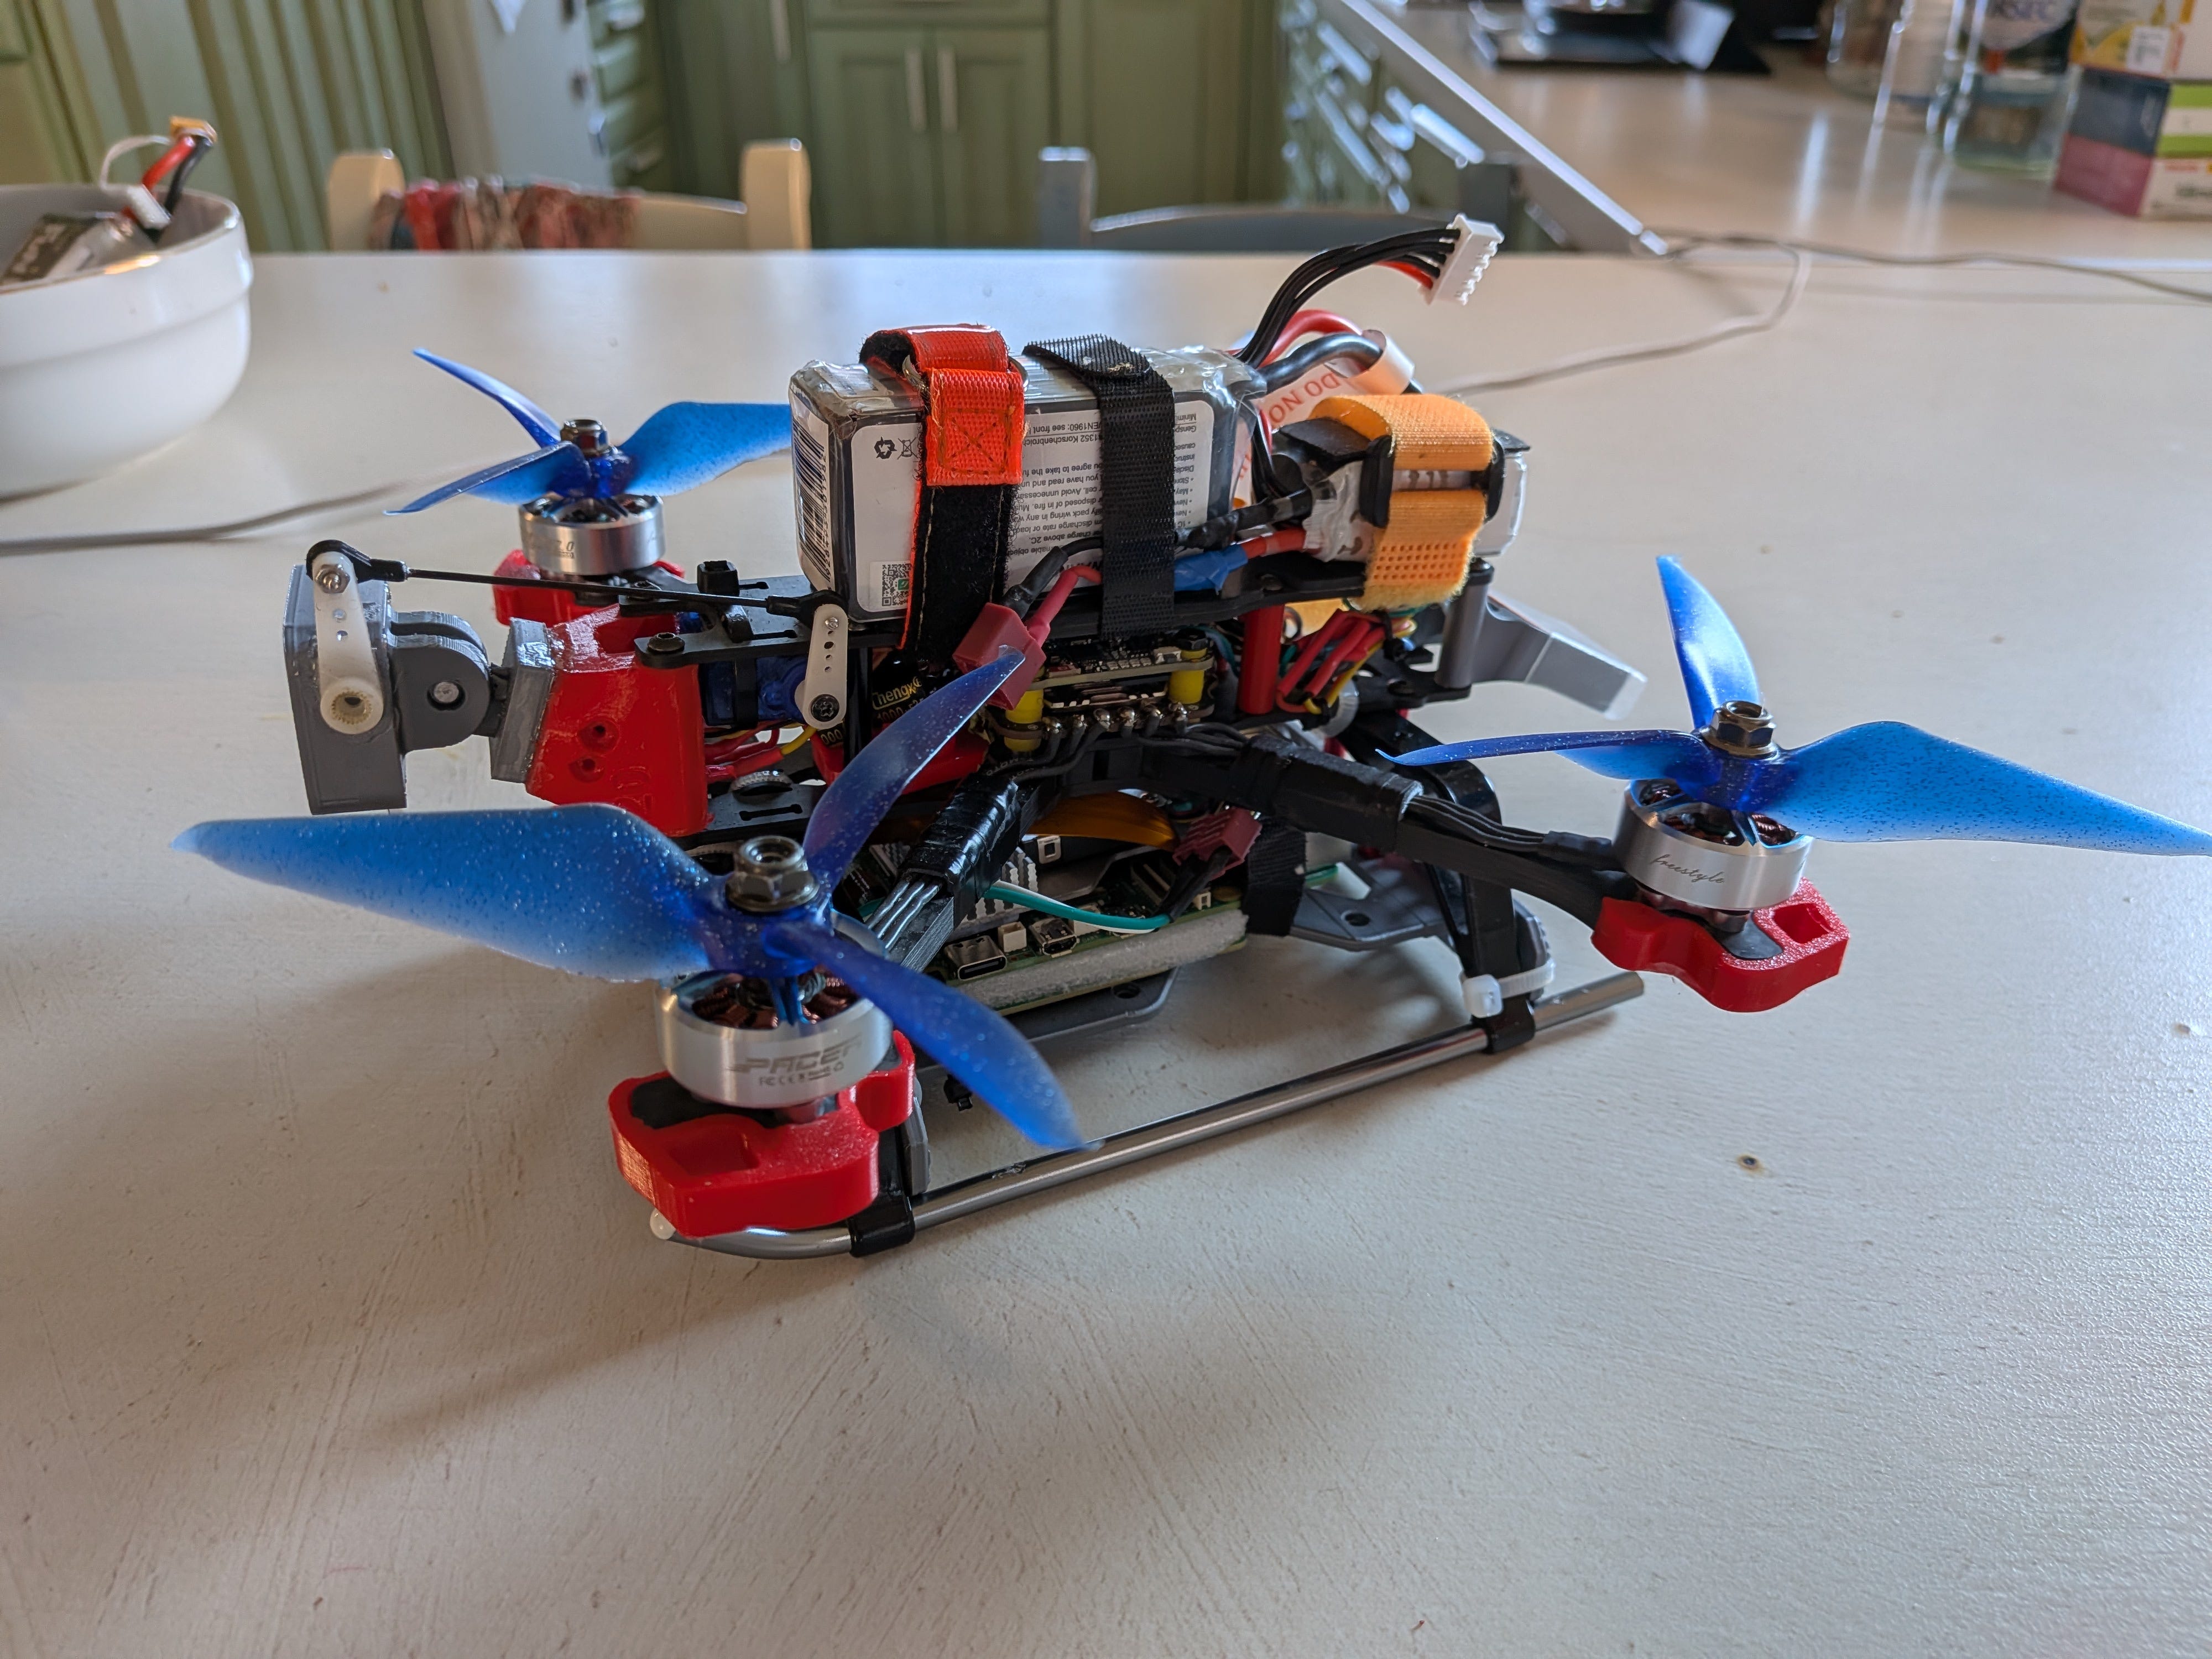
Motortest 1 0 20 1 The build:
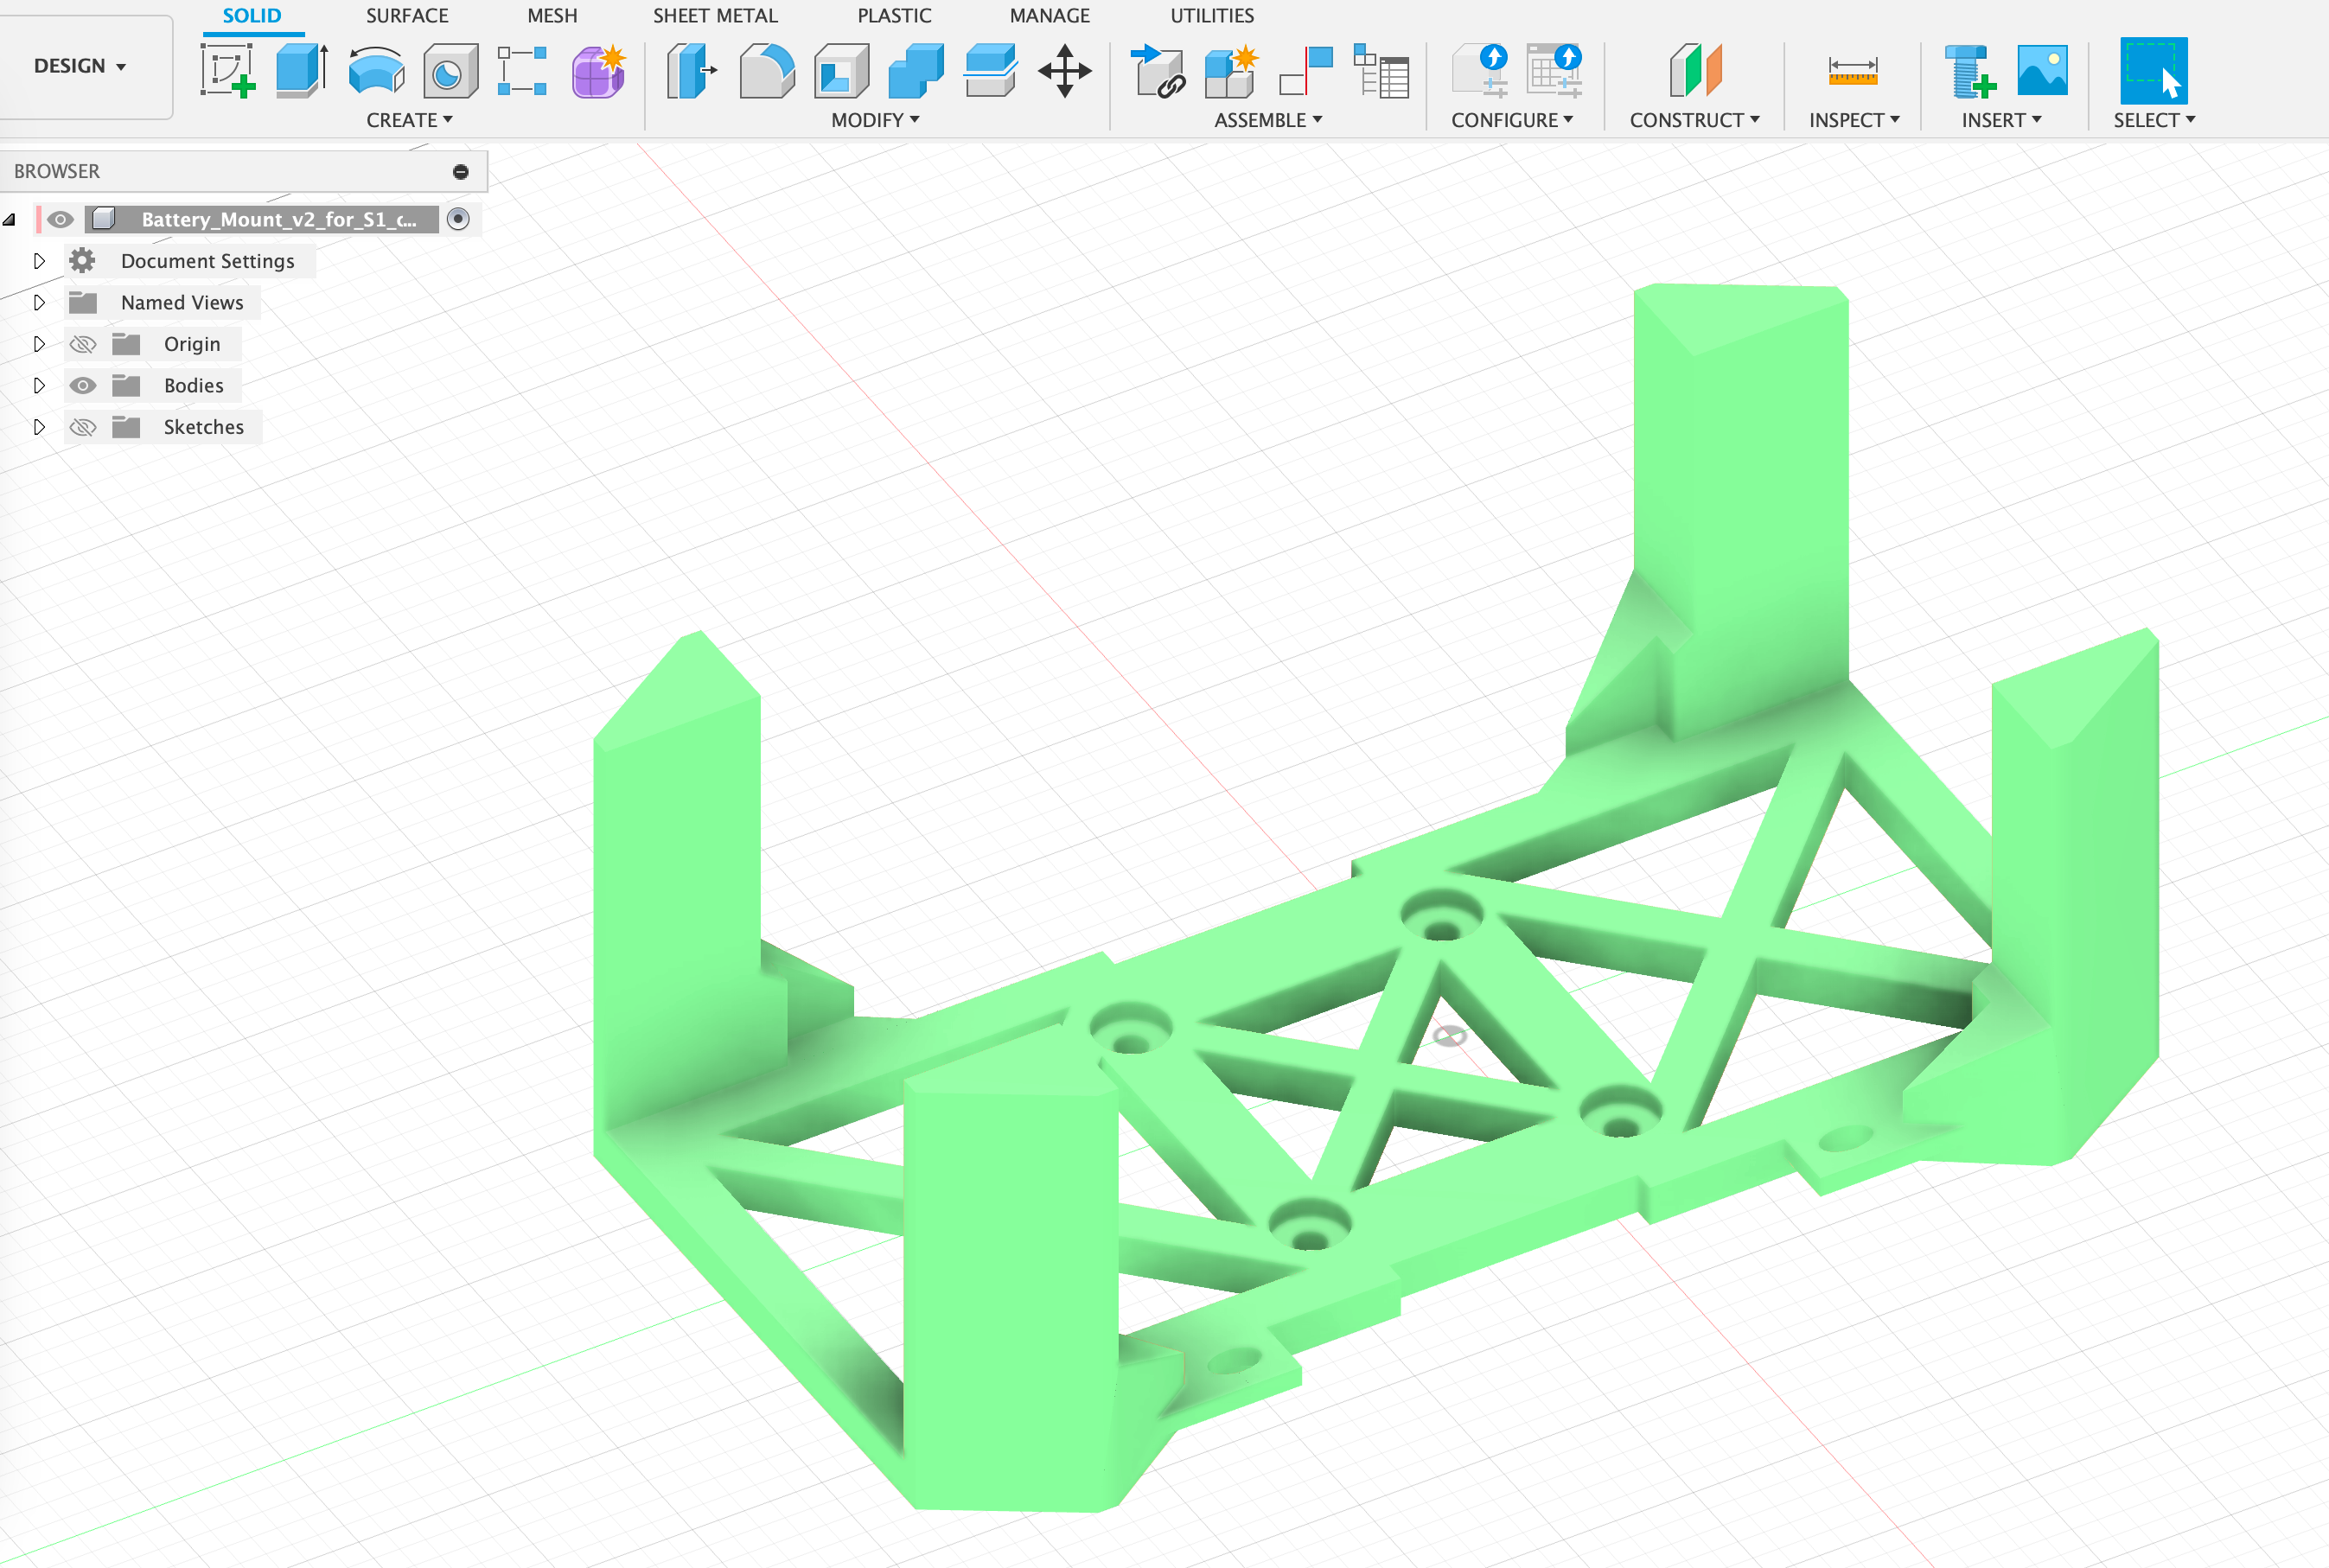
I’ve designed and 3D printed a mount, for stacking the Raspberry Pi with the Hailo accelerator under the drone, while keeping the batteries on top. The Raspberry Pi will need 5V and 5A, so a dropdown voltage converter is used. The Raspberry Pi is powered directly via the voltage pins, not the USB, having it’s own LiPo battery.
The software stack:
Ardupilot
Mavlink
Raspbian OS
Hailo 8 SDK, installed on the raspberry Pi.
Custom Python script, using SCDepth V3 algorithm.
The F405 Ardupilot setup.
While the F405 firmware from Ardupilot comes pre-loaded with all the necessary parameters already setup for flying the drone, they are not really suitable for this use case. PIDs were changed, to make the drone behave better. Here are some examples (new parameters after → ), I won’t get into details on PID tuning:
ATC_RAT_RLL_D: 0.003600  -> 0.001
ATC_RAT_PIT_D   0.003600  -> 0.001
ATC_RAT_RLL_P was 0.080000  -> 0.03
ATC_RAT_PIT_P was 0.080000 -> 0.03
Make the drone to behave slower:
WPNAV_SPEED: 1000cm/s -> 100cm/s
WPNAV_SPEED_DN: 150 -> 75
WPNAV_SPEED_UP: 250 -> 125
WPNAV_ACCEL:250 -> 50The Raspberry Pi setup.
Latest Rasbian OS was used, and the HAILO app suite:
sudo apt install hailo-all
git clone https://github.com/hailo-ai/hailo-rpi5-examples.git
./install.sh
Next step was to create a Python script that was using depth estimation to navigate obstacles.
My first choice for using a depth model was DepthAnything V2, however it proved to be almost impossible to convert to the HAILO infrastructure. Therefore, until I get more time to work of the DepthAnything V2 conversion, I’ve decided to use SCDepthV3, that was already having the .HEF file available with the HAILO infrastructure.
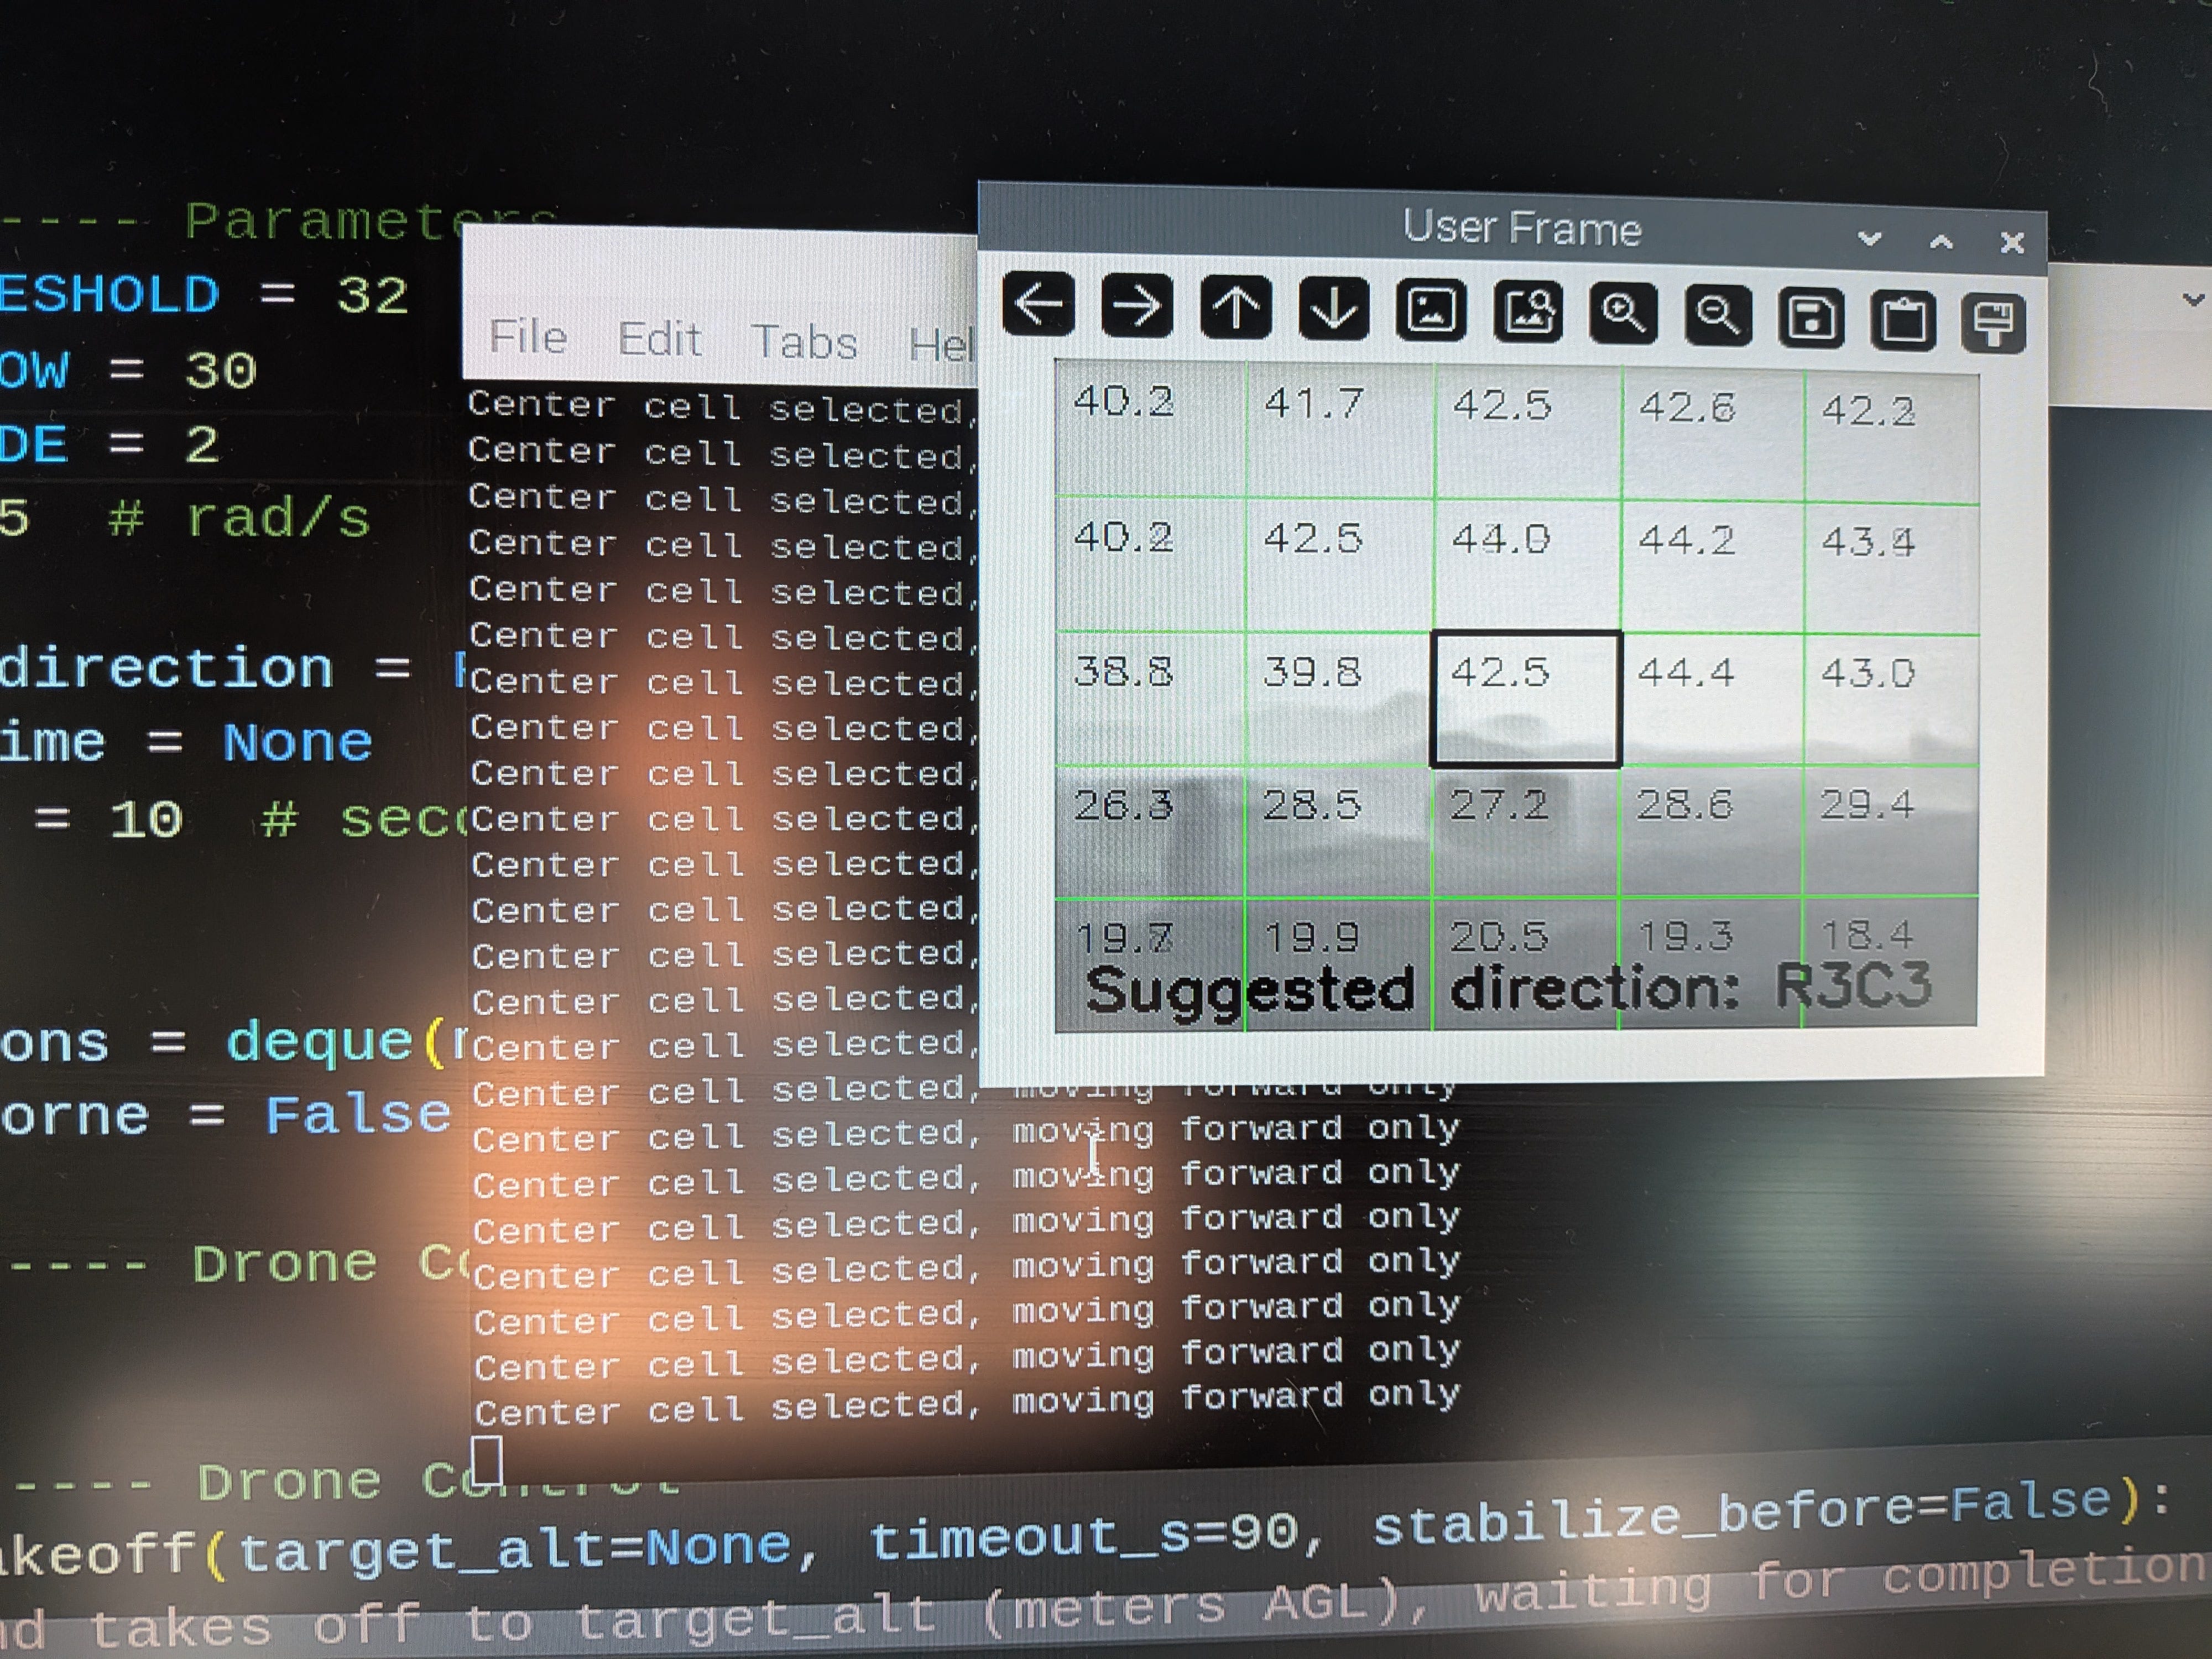
I’ve decided to use a simple algorithm for the drone navigation: split the video input by a 5x5 grid, take depth measurements for each cell and decide the direction based on this. There are multiple drawbacks on this algorithm, but my goal was to build an MVP, work on the drone controls and then improve it.
Before actually testing the drone in real world, I’ve decided to build a Hardware/ Software in the loop simulation.
The simulation
This is where things got a little bit complicated.
I’ve decided to use FlightGear to simulate the drone and stream it’s output directly on the Raspberry Pi/HAILO board. The Python app will take the stream input, convert it into drone commands and then send it back to the FlightGear sim.
This is the setup:
Ubuntu VM, running under VirtualBox on a MACBook Pro
FlightGear3D
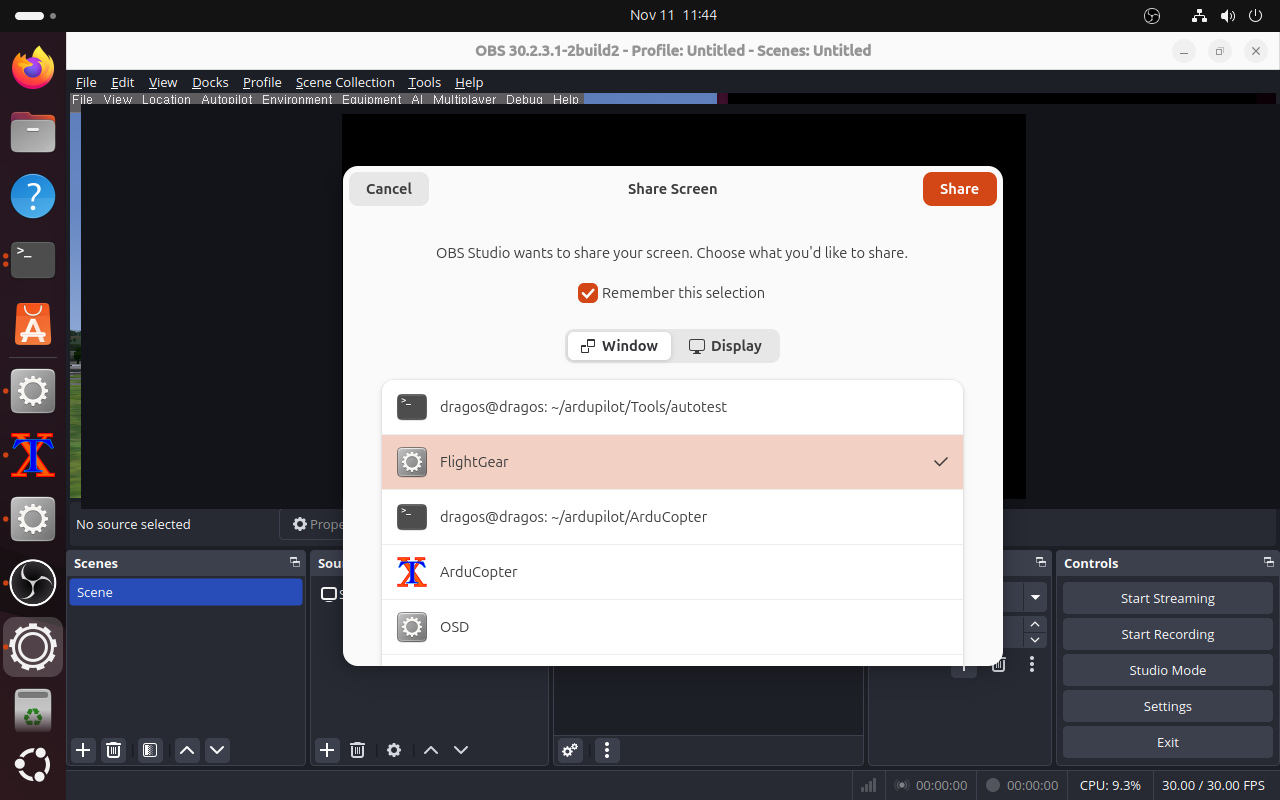
OBS for capturing the FlightGear3D window and streaming it to the HAILO app
The FlightGear setup:
For installing it:
sudo apt-get install flightgear

For using it:
Cd ardupilot/Tools/autotest/
./fq_quad_view.sh

Some configs that needs to be changed:
Disable the debug text:
Arducopter-set.xml remove -> <nasal> -> debug text

Disable the drone rendering:
Edit fg_quad_view.sh
--prop::/sim/rendering/draw-mask/aircraft=false
Usage: sim_vehicle.py -v ArduCopter -L Cluj --enable-fgview —out:udp:192.168.68.100:14550 -V ArduCopter --osd
192.168.68.100:14550 -> this is the IP address for the Raspberry Pi/HAILO board.
-L Cluj is a custom location I've defined, for the CLuj airport.OBS needs to be started and the FlightGear window to be selected:
There are some more configs to be done with OBS:
OBS settings:
Service: Custom
Service: rmtp: //localhost/1935:live
Stream key: flighgear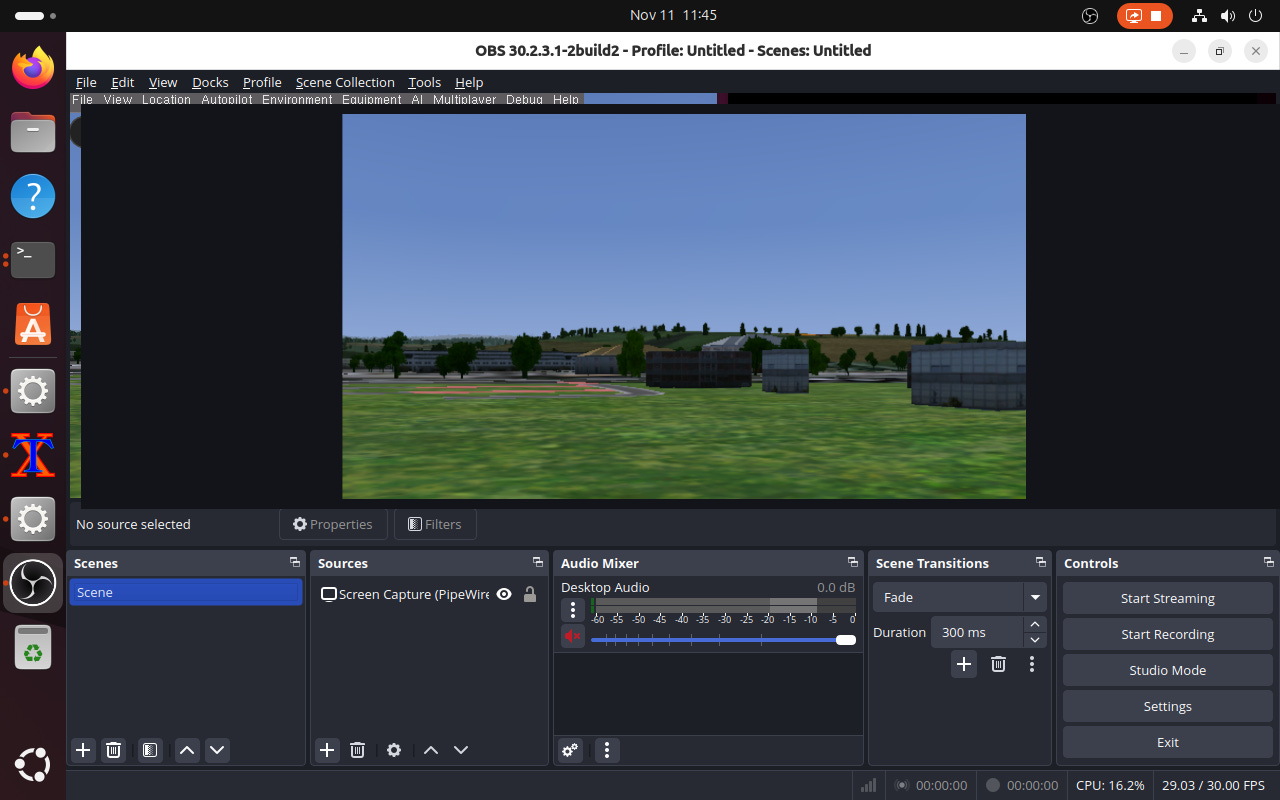
For the Python drone control script, many HAILO config files need to be done:
Change the resolution of the input stream, to the one of the SCDepth model
HAILO update to remove the preview window
Modify the Hailo Pipeline to accept rtsp stream input, in depth_pipeline.py:
  elif self.source_type == “rtsp”:
            source_element = (
                f”rtspsrc location={self.video_source} name=src_0  message-forward=true ! “
                + “rtph264depay !”
                + “queue name=hailo_preprocess_q_0 leaky=no max-size-buffers=5 max-size-bytes=0 max-size-time=0 ! “
                + “decodebin ! queue leaky=downstream max-size-buffers=5 max-size-bytes=0 max-size-time=0 ! “

                “ video/x-raw, format=I420 ! “
            )
In the end, the python drone control script, will be called like this:
python basic_pipelines/depth4d_mavlink.py  --input rtsp://192.168.68.107:8554/live/flightgear --arch hailo8 --use-frame

Where 192.168.68.107 is the IP number for the FlightGear Ubuntu machine.
To connect to the sim:
# ---------------- MAVLink Setup ----------------
master = mavutil.mavlink_connection(’udp:0.0.0.0:14550’)
master.wait_heartbeat()
print(”Connected to system”)
I will not get into details on the actual drone control script, however, apart from the direction decision module, it uses MavLink commands to send commands to the drone and some smoothing algorithm to prevent too many unneeded changes of directions.
Here is a sim example. The drone takes off, it will detect obstacles ahead and will avoid them. After it determines, based on the depth of field, that no objects in front of it, it will resume flying straight. This can also be adapted to waypoint navigation.
Conclusions and thoughts for improvements:
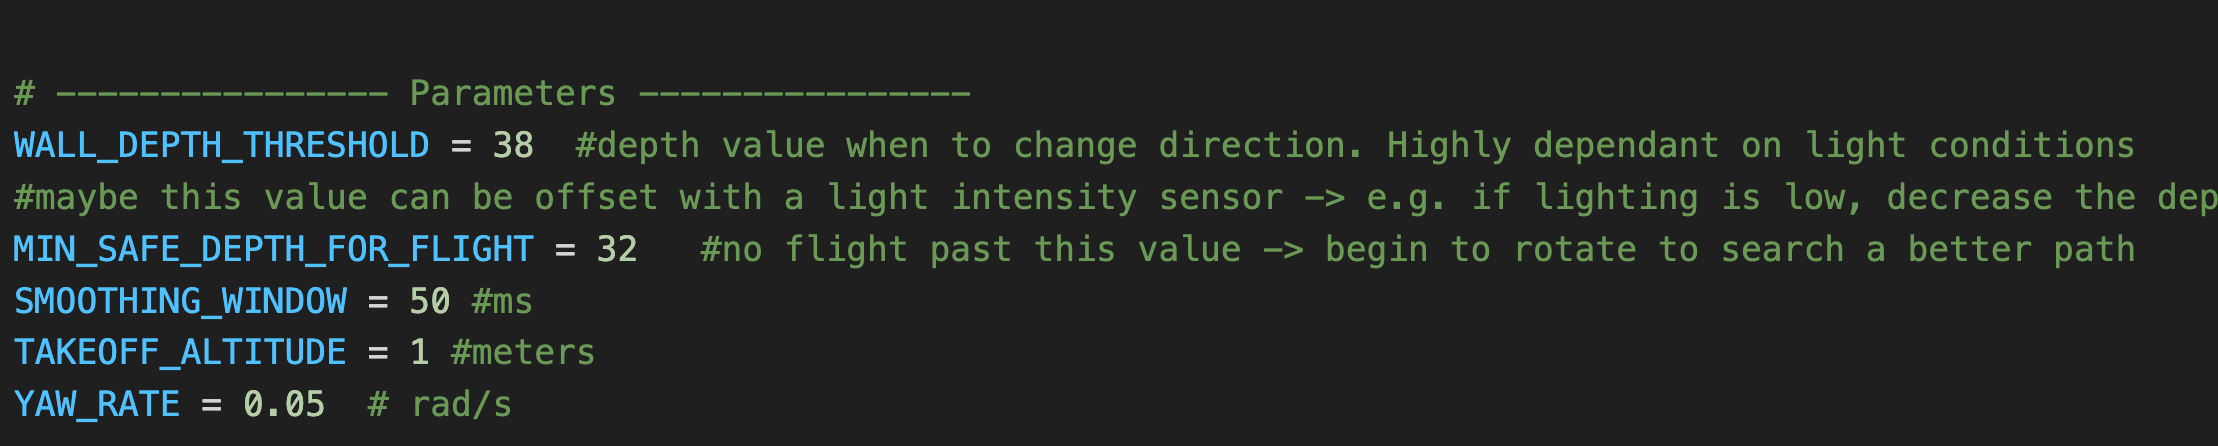
Depth values are highly dependent on lighting conditions. The depth value where the drone decide to change the flight path is hardcoded in my script. I have some ideas on how to improve it, for later.
When flying forward, drones will rotate around their pitch axis. This will mean that the camera will have a different context based on the speed and pitch angle of the drone. This can be resolved by using a gyro stabilized gimbal, that will always keep the camera pointing straight, no matter the drone orientation.
The flight
On the third flight, the drone decided to go fully rogue, and crash on the roof of my house :). The cause was some bad PID settings. Weaknesses in the frame were corrected in the version 2.0.
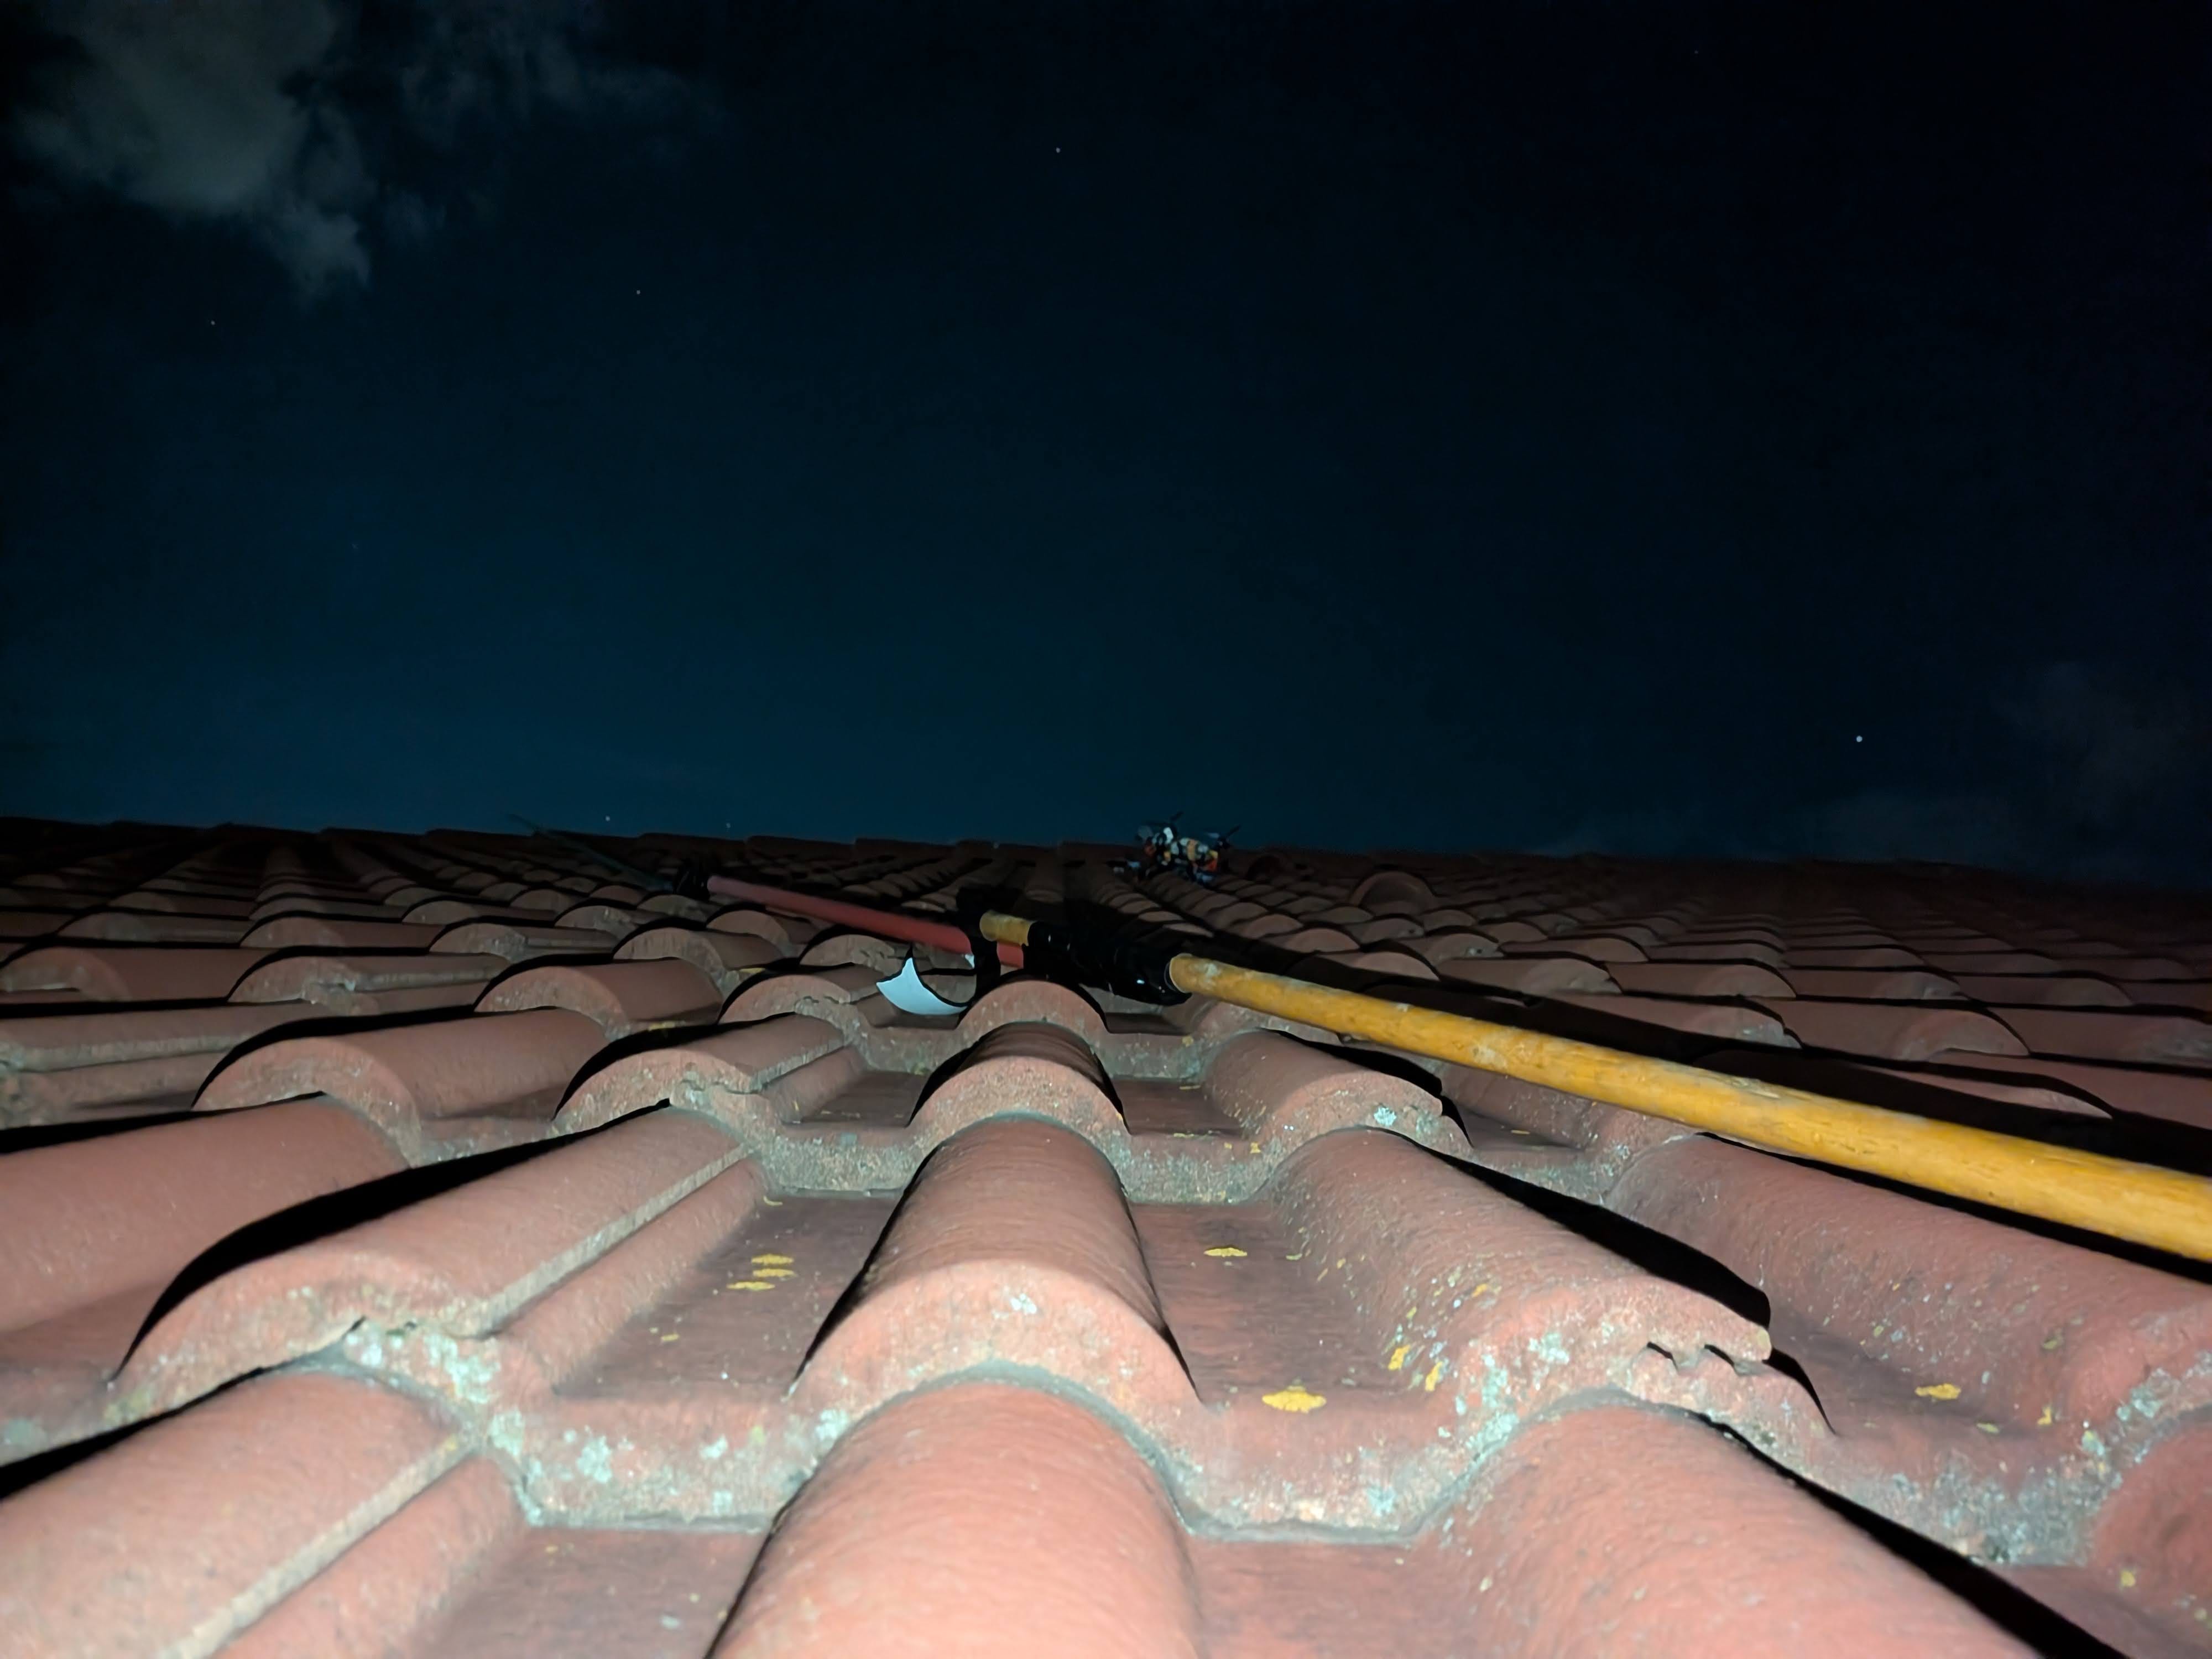
The Pi was also destroyed in the process, so I had to buy another one.
Version 2.0.
I’ve decided to build a better landing gear, to house the Raspberry Pi & Hailo 8 boards, while also being able to better absorb hard landings shocks.
Also, I have changed the camera to the module 3 camera, with auto FOV. And, after doing a custom Ardupilot firmware package (*the F405 have only 1MB of flash) I’ve managed to enable the camera stabilization around the pitch axis, using one 5V servo. .
Script was also updated to handle variable speeds when approaching obstacles and better takeoff procedure.
In the next post I’ll share the flight video.